
For more info and to see many of the axes and celts Larry has made, go to: "AXE ME NO QUESTIONS"
(revised, 30/Mar./2016)
Material Selection
For the axe or celt:
Choose a fine-grained basalt, diorite, granite, quartzite, or other granular material that looks like it has enough strength to hold together under the stress of chopping wood. Usually, the finer the grain size, the stronger the tool. Remember also, that small grain size means more work but the tools will last longer.
Test the stone by hitting it with a hammerstone or rock hammer. If the stone breaks easily, discard it. You'll want tough stone.
Find a stone that looks something like an axe or celt already. This will greatly influence the amount of labor needed to make the tool. In ancient times, craftsmen might walk many creeks before finding the perfect rock. In modern society, we may only be able to get permission to walk .001 percent of the area to which they had access. I'd bet, while hunting and/or foraging, ancient ground stone tool makers kept their eyes open for material wherever they walked and were able to pick the "cream of the crop".
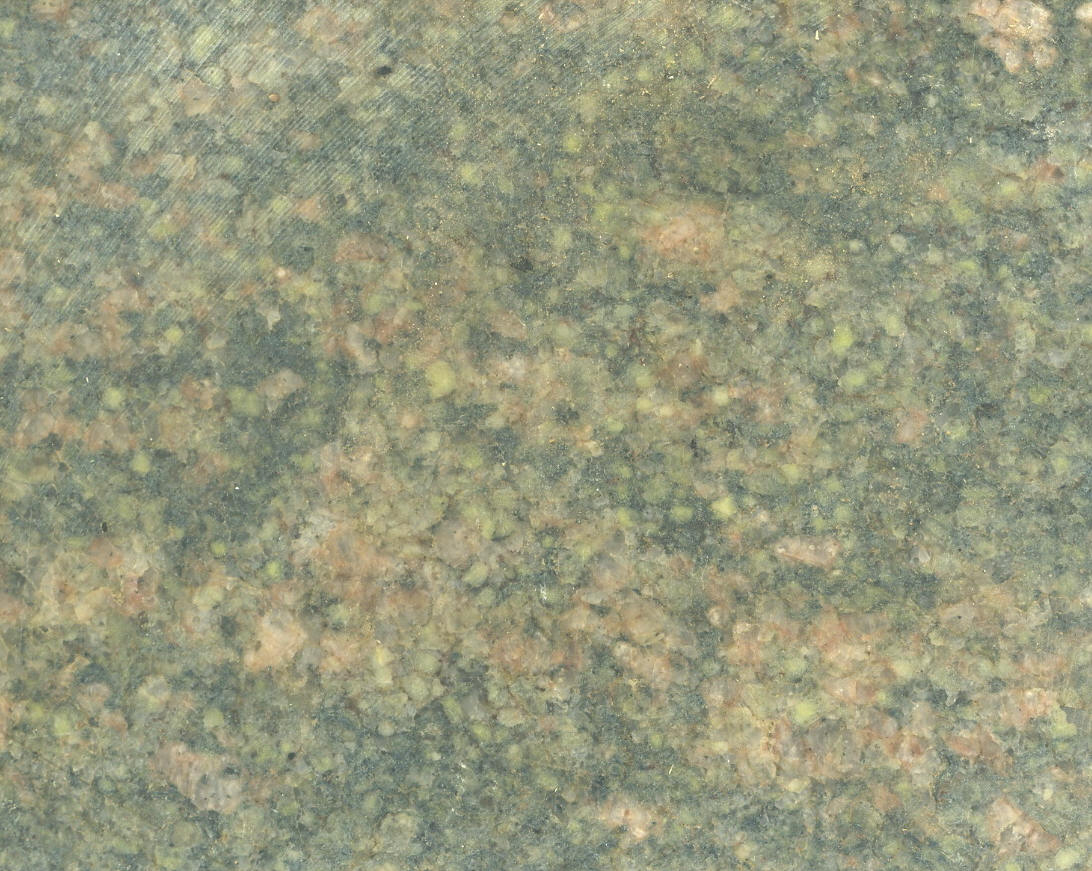
 (Photos LK) Some close-ups
of the types of granite (sawn slabs) Larry uses.
(Photos LK) Some close-ups
of the types of granite (sawn slabs) Larry uses.
 This edge has cut over 400 trees.
 (Photo Pete Bostrom)
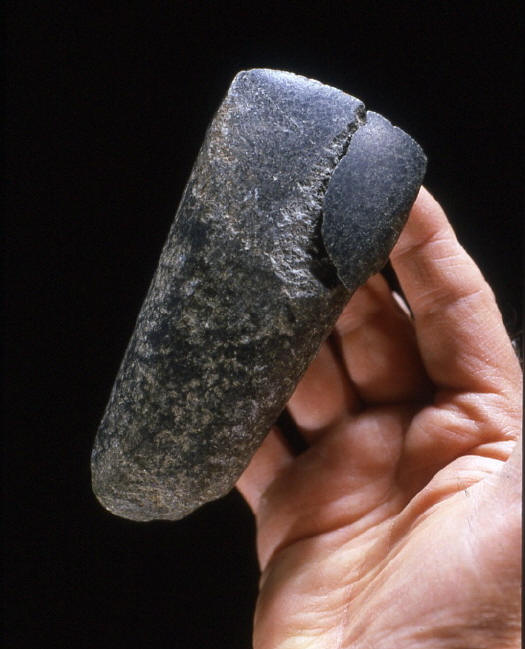
This broken celt was made of diorite granite.
(Photo Pete Bostrom)
This broken celt was made of diorite granite.
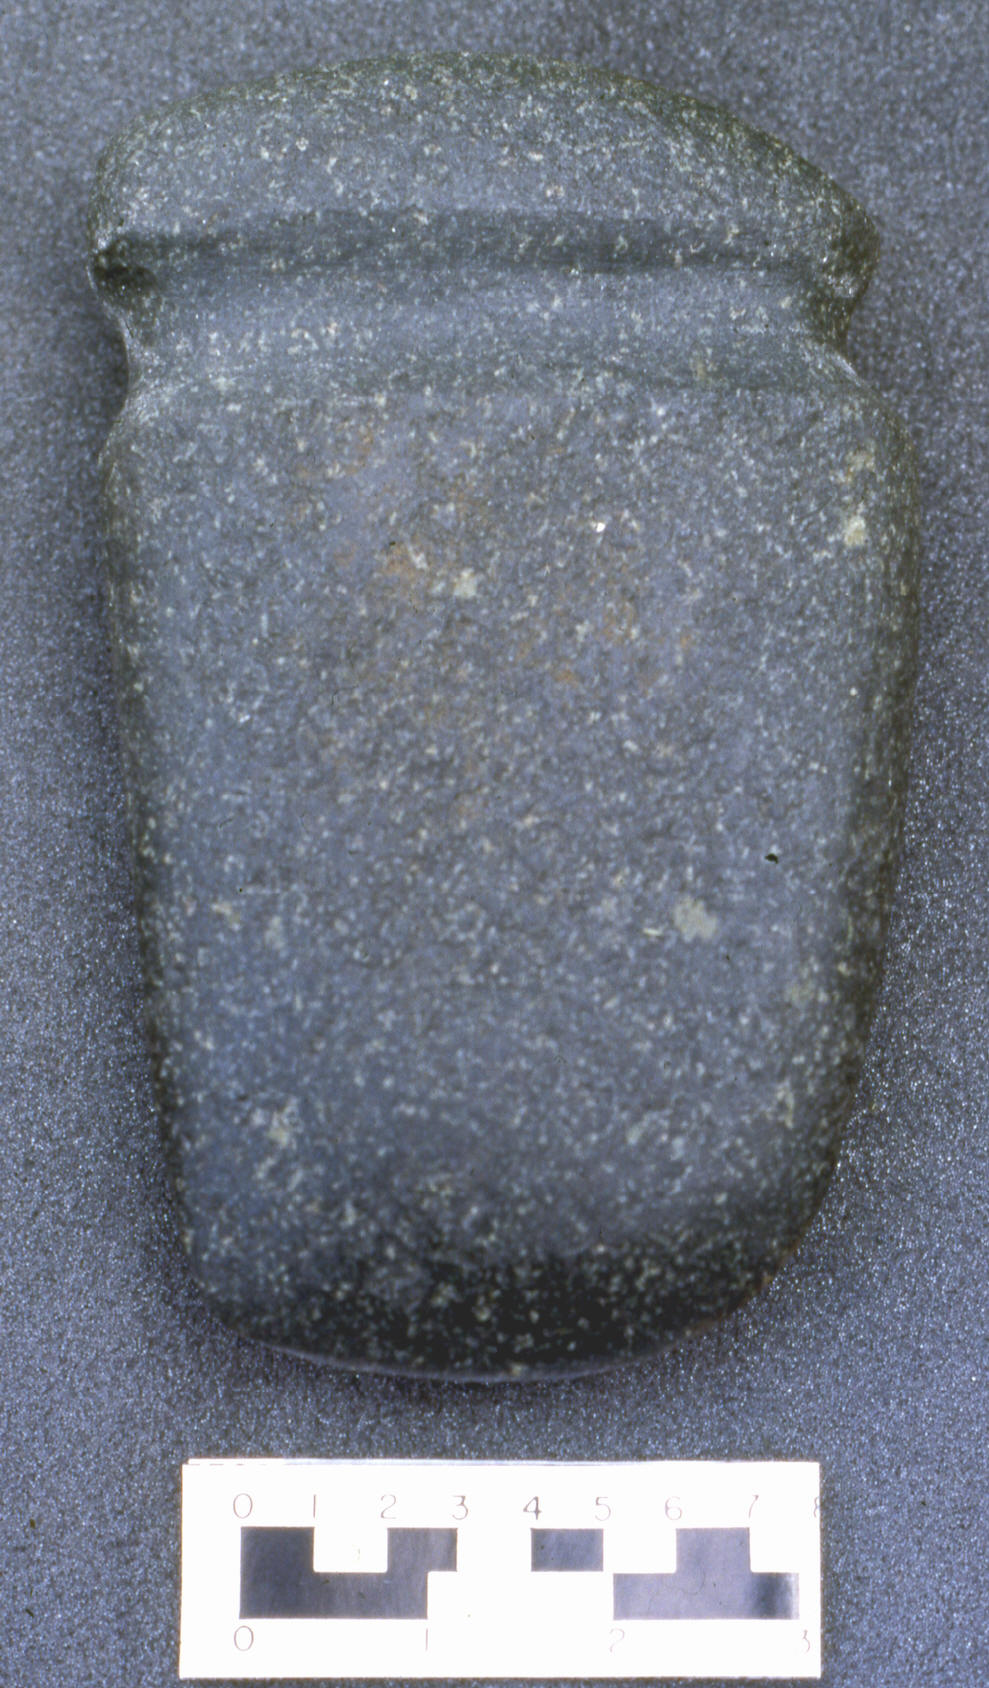 This full-grooved axe is also made of diorite granite.
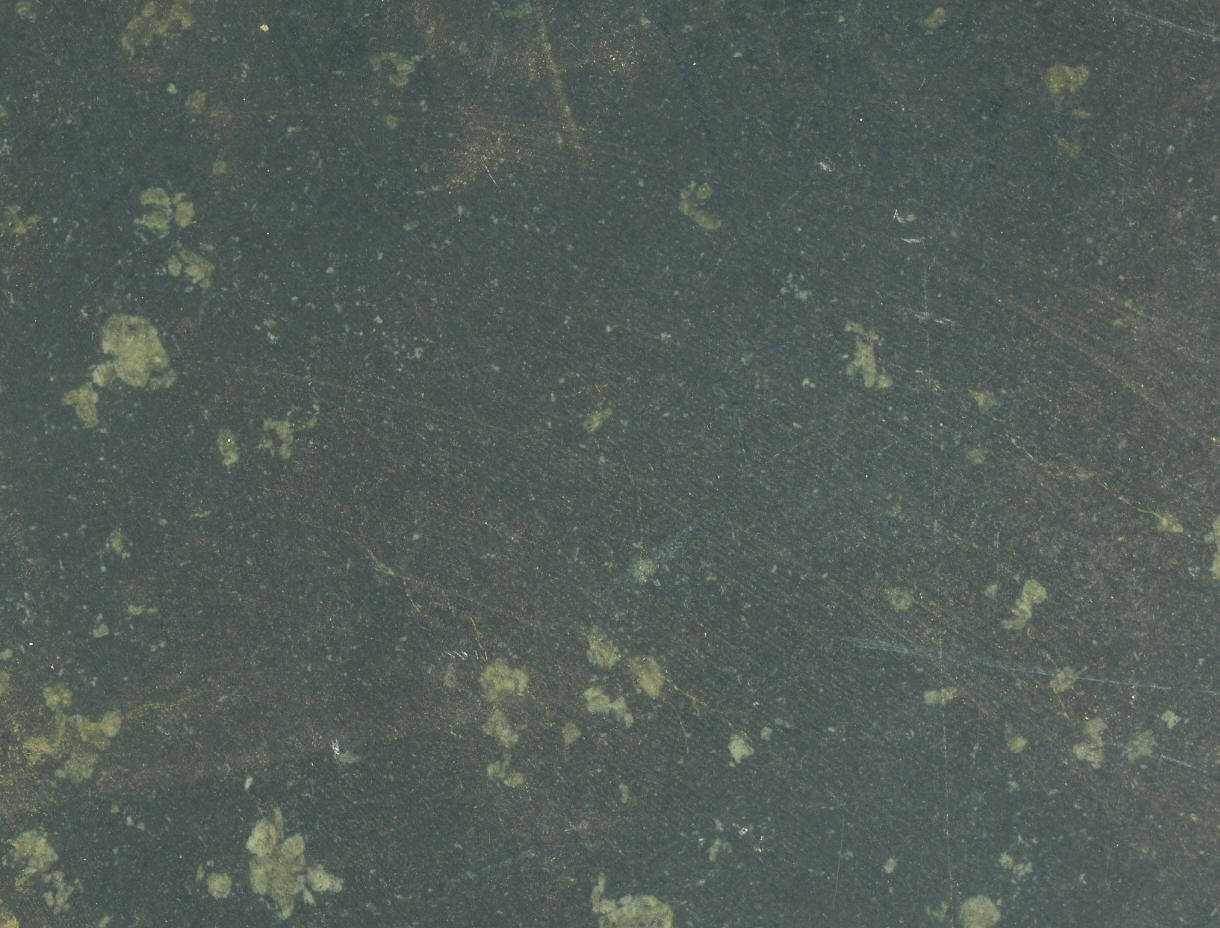
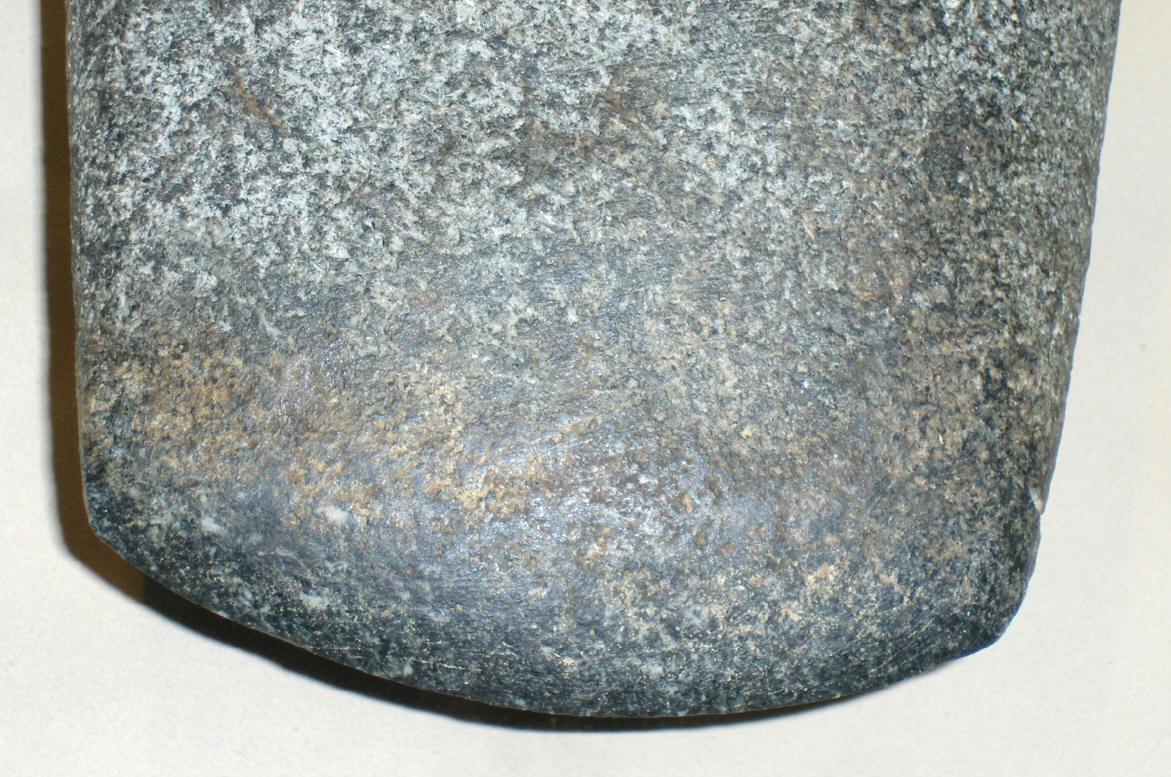
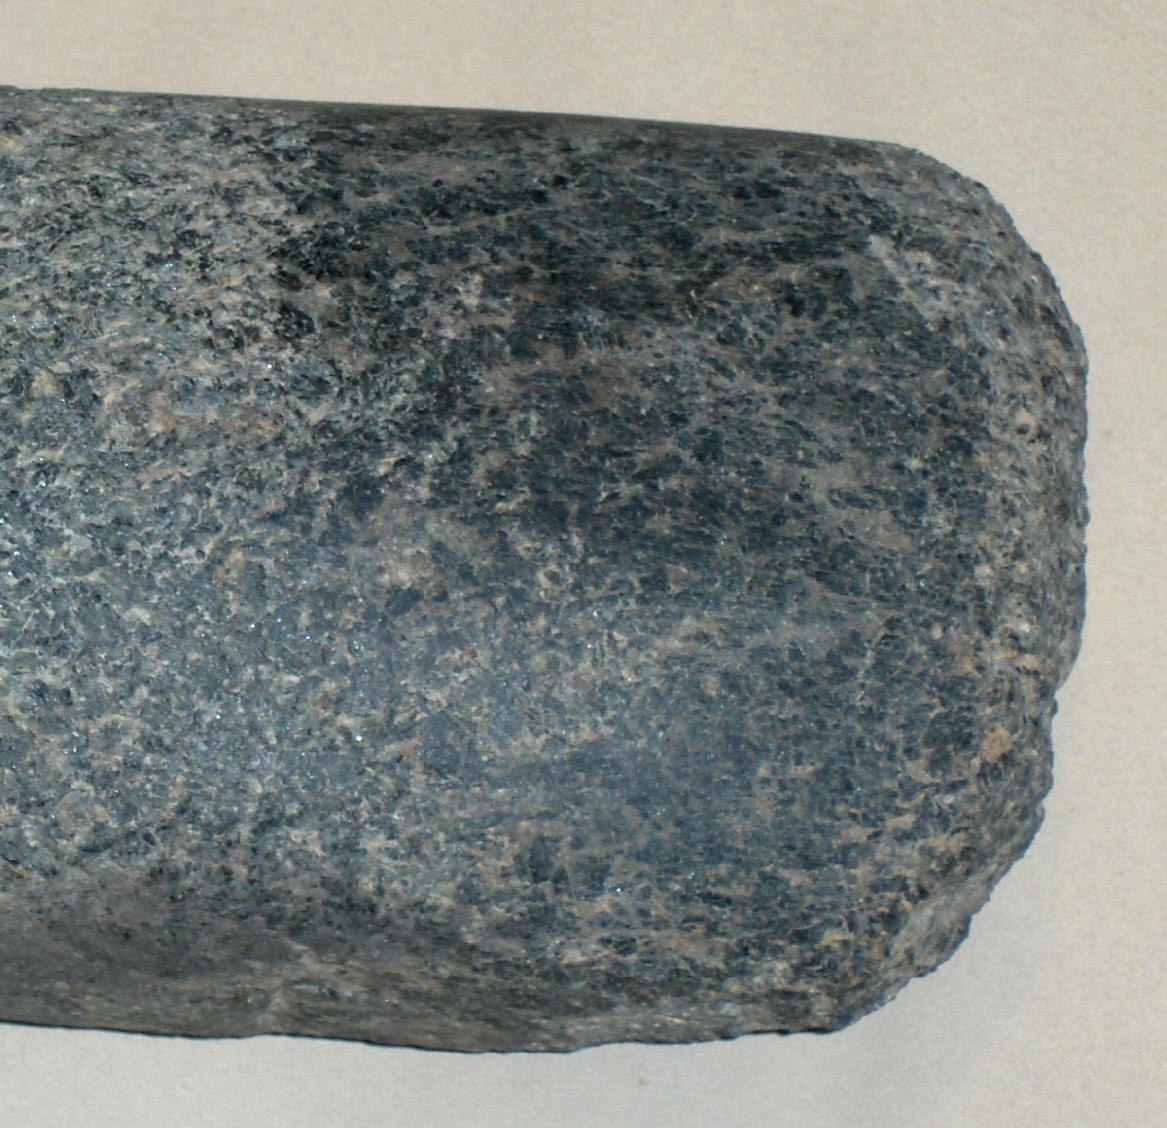
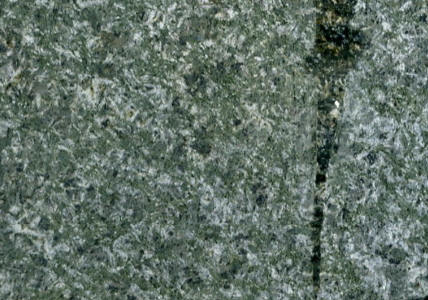 (Photo LK) Basalt (one variety)
from the St. Francis Mountains, Missouri. Mississippians (and Larry) love this
material. It works well and seems to hold together well under the stress of the
manufacturing process.
(Photo LK) Basalt (one variety)
from the St. Francis Mountains, Missouri. Mississippians (and Larry) love this
material. It works well and seems to hold together well under the stress of the
manufacturing process.
There are many variations in the material from the same mountain, as shown in the next series of pics.
![]()
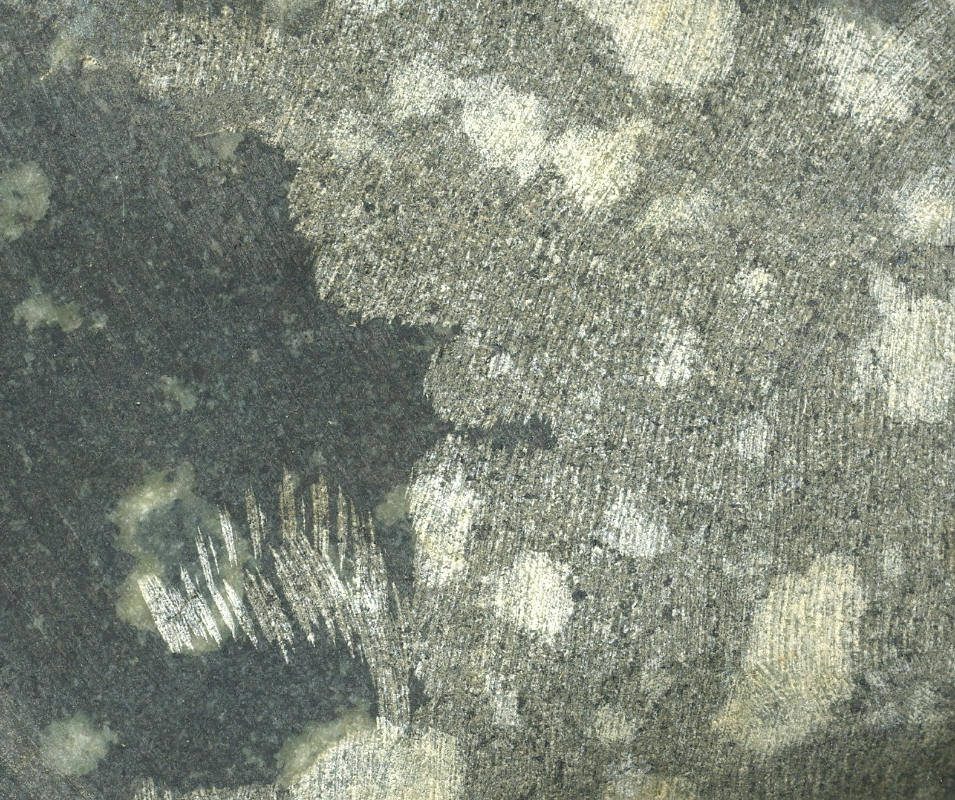
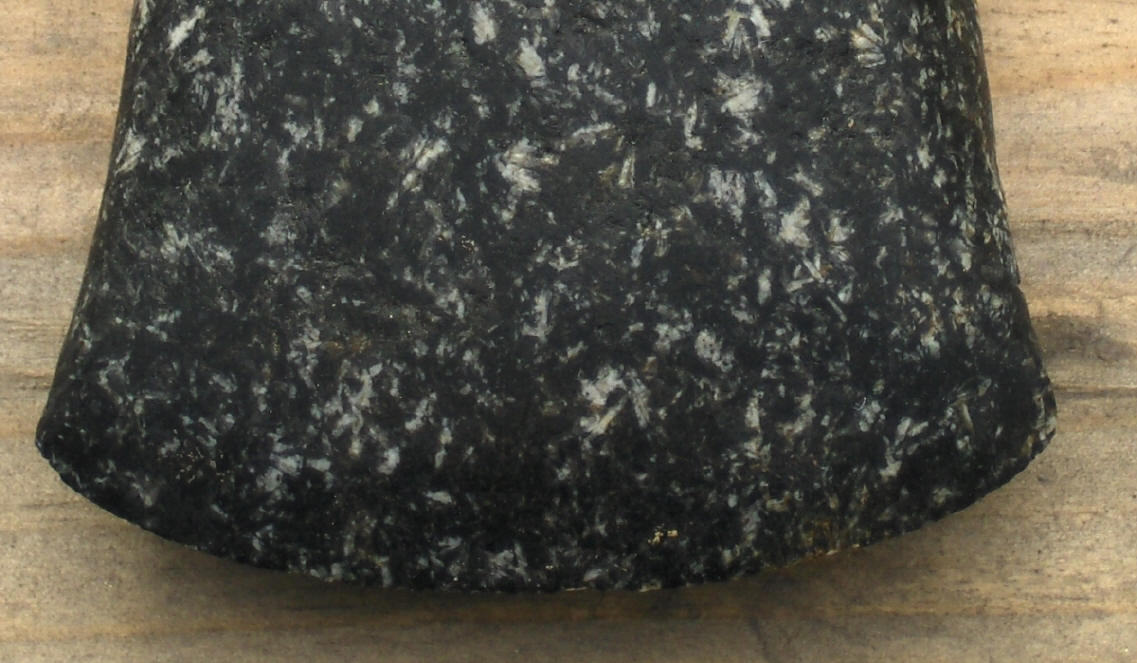
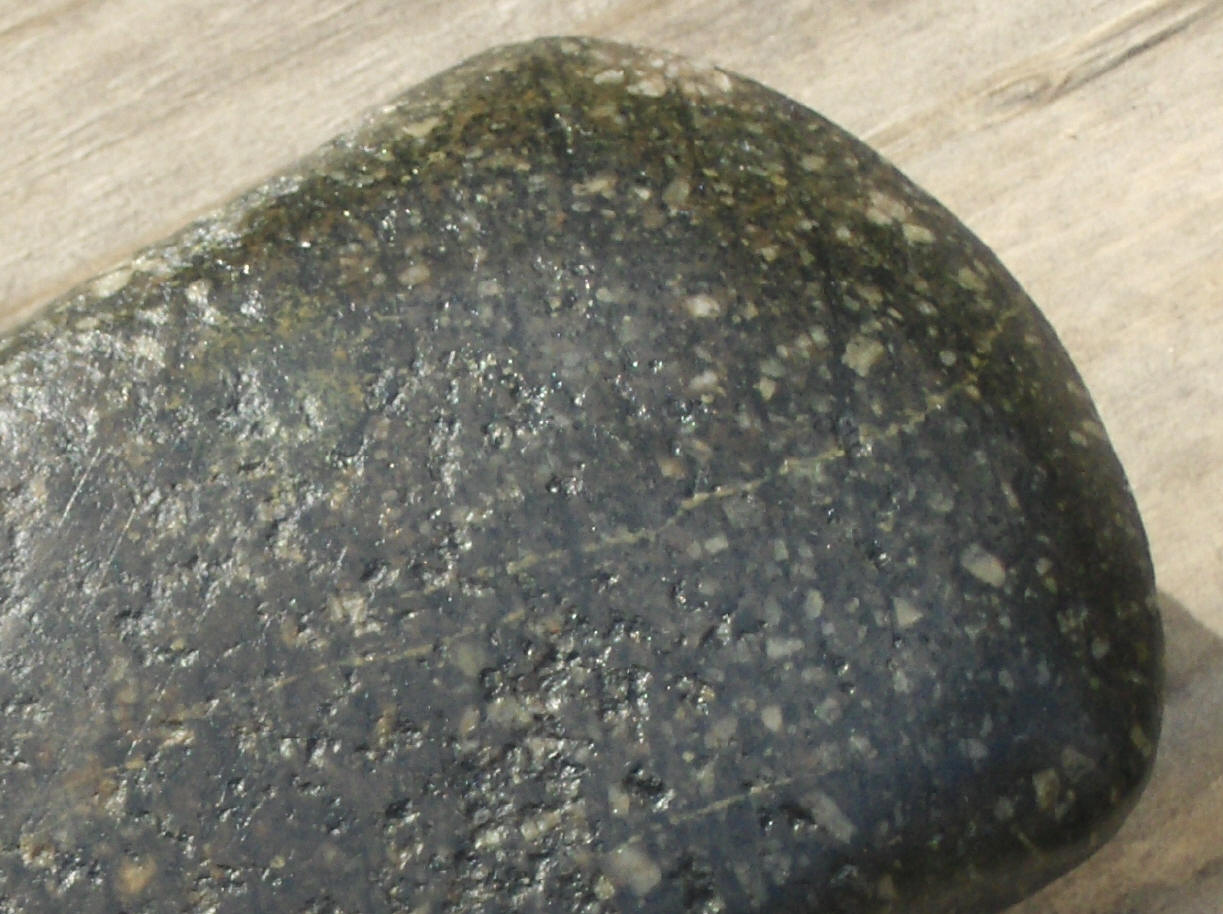
 Here's a close up of a broken Mississippian celt in
Larry's collection. The material's source should also be the St. Francis
Mountains of Missouri.
Here's a close up of a broken Mississippian celt in
Larry's collection. The material's source should also be the St. Francis
Mountains of Missouri.
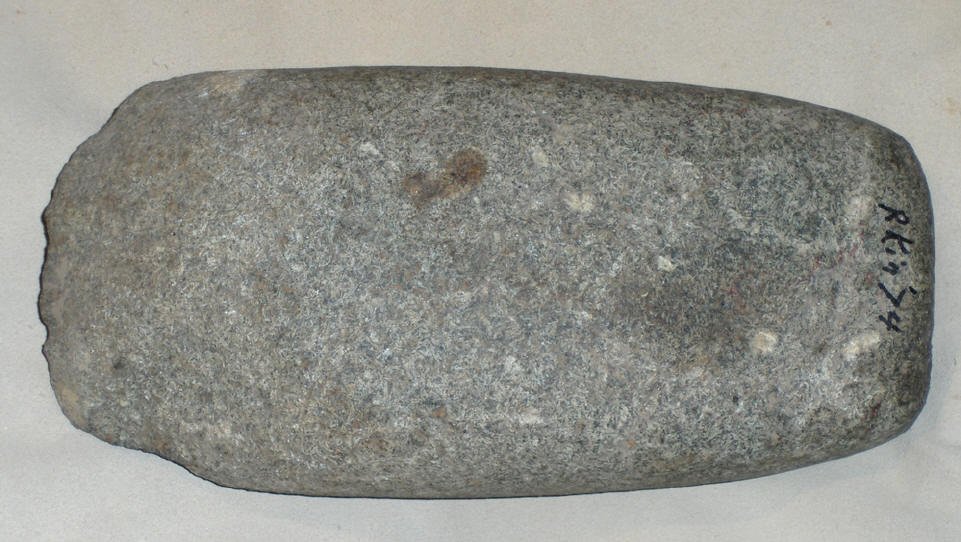
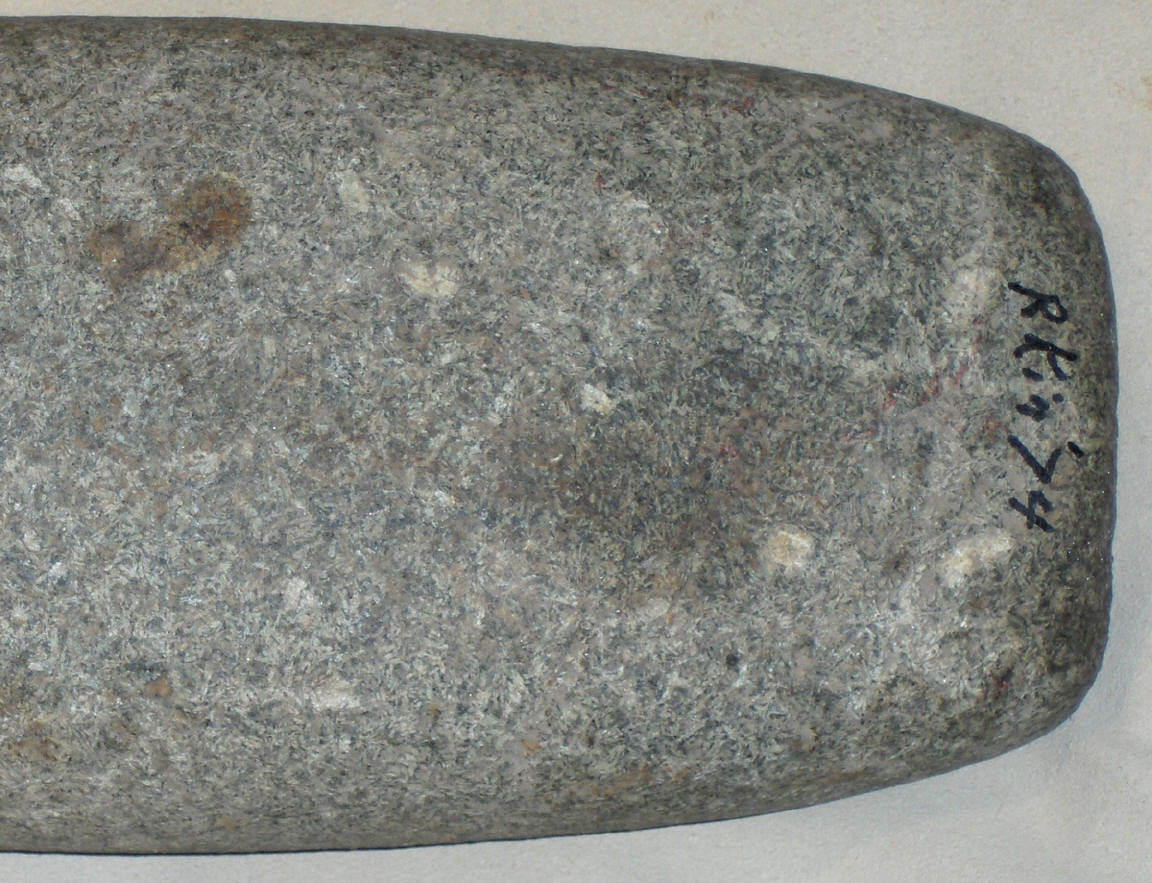
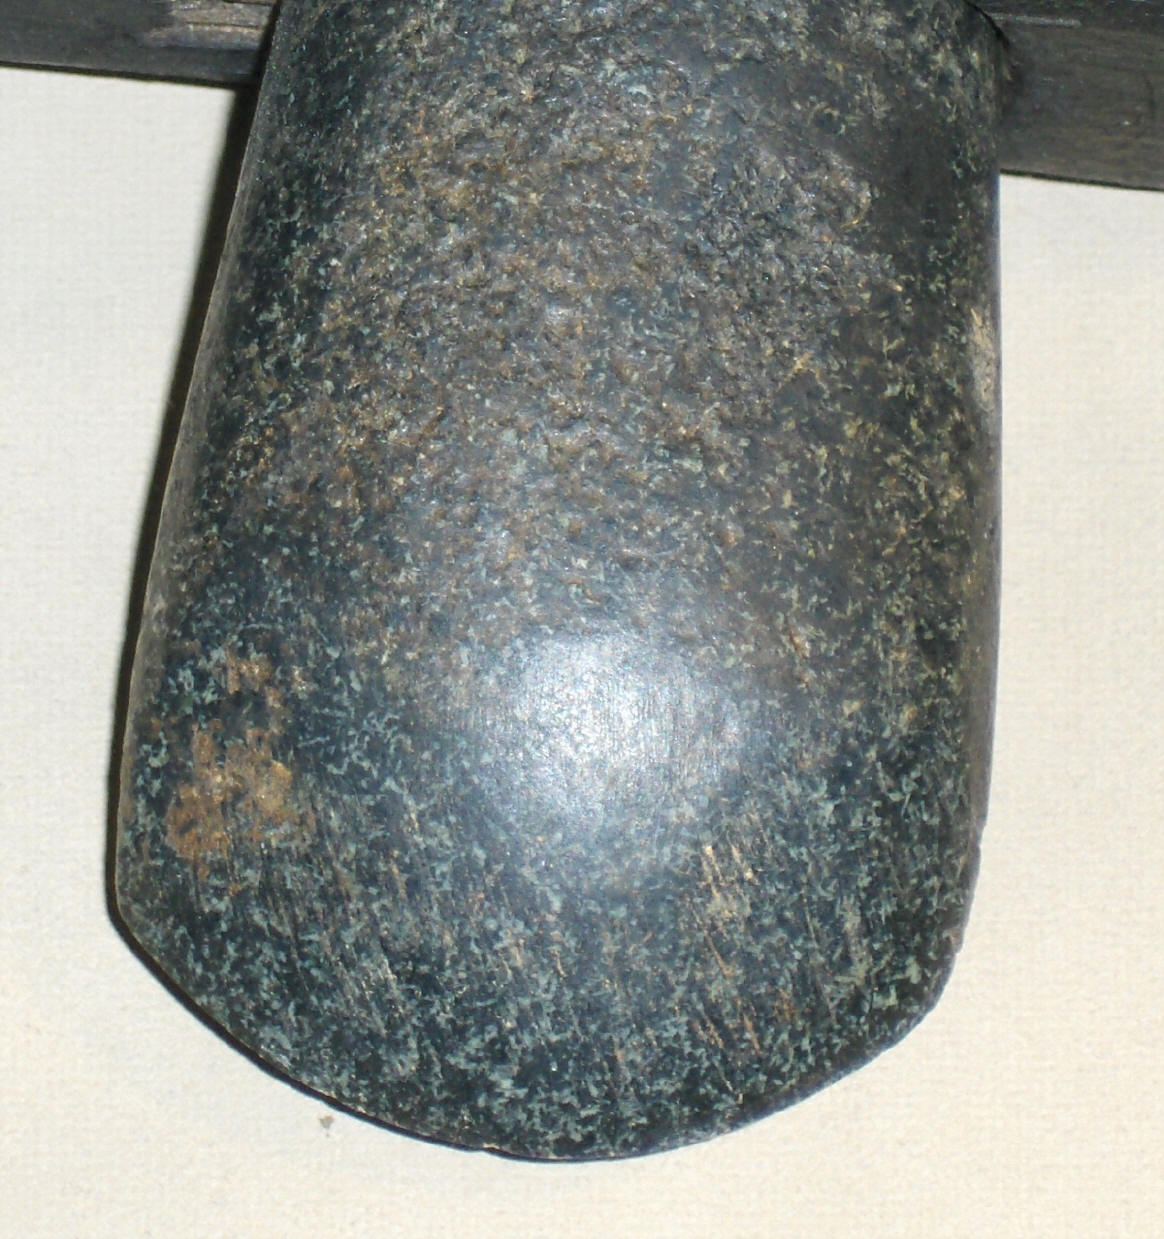
![]() This celt was found in 1974 by Larry. Before Larry's
Mom sold the Pleasant Ridge Park property to the city of Fairview Heights, his
uncles Joe and Tom mentioned that he should check under the work bench in the
old horse barn, for a stone axe they used to use to set the rivets in sickle
bars for mowers. Larry looked and looked but could not find the axe. He even
probed the entire area but it was nowhere to be found.
This celt was found in 1974 by Larry. Before Larry's
Mom sold the Pleasant Ridge Park property to the city of Fairview Heights, his
uncles Joe and Tom mentioned that he should check under the work bench in the
old horse barn, for a stone axe they used to use to set the rivets in sickle
bars for mowers. Larry looked and looked but could not find the axe. He even
probed the entire area but it was nowhere to be found.
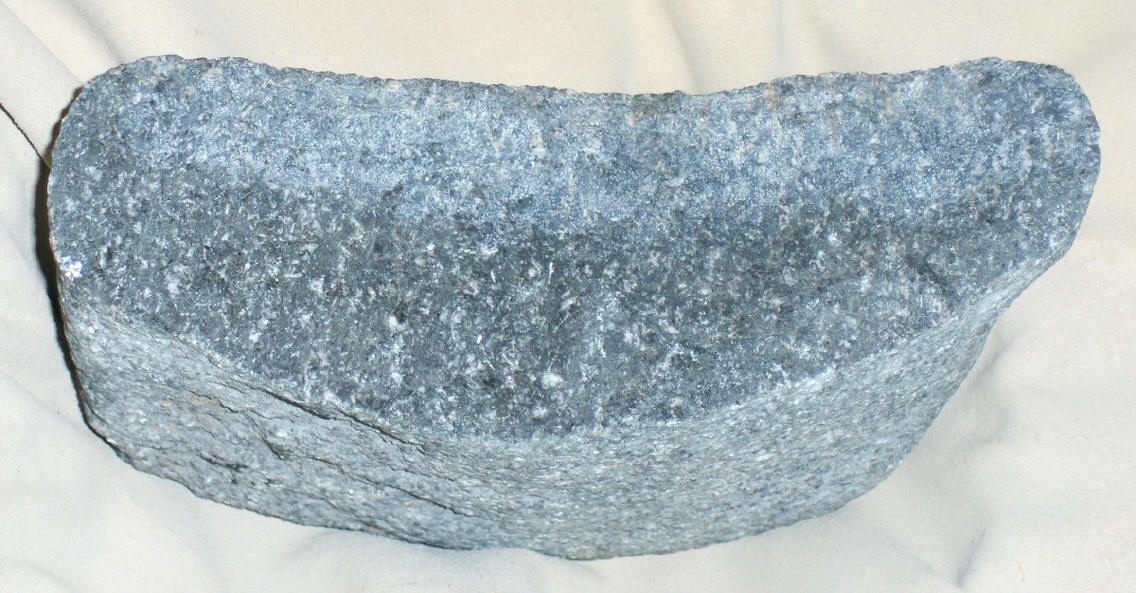
A few years later, the Kinsella family held a reunion and used the park bench near the old barn after it had been torn down. While sitting on the park bench, Larry looked down and saw a piece of greenstone sticking out of the ground. When he pulled it out he realized that it was that old axe his uncles had told him to find. It was a Mississippian celt, instead of an axe. The bit had been beat to death by the family but it was a true artifact and showed how the St. Francis basalt can also have large inclusions.
HINT
Garden centers can stock many varieties of granites and/or basalts. They are a good source for raw materials and it's possible to find "axe-like" shapes in their collections.
Tools
Hammerstones
Larry suggests using chert/flint
hammerstones, since they are found on archaeological sites in his area, near St.
Louis, Mo. Start out with a chunk of chert/flint like this:
![]() and, after a few hours, it will turn into this
and, after a few hours, it will turn into this
![]() .
Chert is almost the perfect tool. Even if the stone is struck with too much
force, the flint/chert (the point of least resistance) will fracture, preventing the full force from being
transmitted into the axe or celt. You will have much waste from the chert/flint
in the beginning but, as the chert/flint turns into a ball, the tiny protrusions
will remove the axe material more efficiently.
.
Chert is almost the perfect tool. Even if the stone is struck with too much
force, the flint/chert (the point of least resistance) will fracture, preventing the full force from being
transmitted into the axe or celt. You will have much waste from the chert/flint
in the beginning but, as the chert/flint turns into a ball, the tiny protrusions
will remove the axe material more efficiently.
Other fine-grained hammers, like this
quartzite one, may be used.
![]()
For the non-traditionalists, some hardened steel tools may be used. Be careful not to hit too hard as they may break the stone.
Starting a stone axe: https://www.youtube.com/watch?v=TFxTYE_w_gM
Technique
![]()
The technique used is called pecking and grinding. The pecking is done by hitting the axe material with the chert/flint hammerstone, pulverizing the surface. This removes one grain at a time. It's very time consuming but produces good results. Larry prefers to work the stone wet, that is, he wets the immediate area he is working. He keeps a little water nearby and slightly moistens the area then pecks, with the hammerstone. The wet area shows him exactly where he is hitting because each peck removes a tiny speck of moisture, when hit.
Larry also soaks the axe material in water between work sessions.
Larry believes the Ancients found out that green stone could be shaped, when observing the greenstone hammerstones they used to flintknap. During flintknapping, portions of the hammerstones are removed over time. It shouldn't have taken very long for the ancient craftsman to notice that flint/chert can work granular materials and granular materials can work flint/chert. The 2 materials go hand-in-hand.
As you work, you will develop preferences for working. Sometimes, you may work on edges first, or flat surfaces, or circular areas, It doesn't seem to matter as long as it works for you. Larry has found that working small sections (about 1 inch squares) works best for him. It helps to remove material from the edges of areas worked before because it gives a place for the removed granules to go. Also, that's about as much area as you can work before the moisture dries out. You will find that the surface of most stones is harder to start. It's usually easier, once the surface is removed. Sawn slabs are difficult to start but, once the surface is removed, their workability is improved.
The pecking shapes the tool. Grooves are made with this simple technique, also. Smaller or more elongated flint hammers will allow you to get into the grooves more readily.
Warning: Patience and persistence are needed during the pecking process. Try working for an hour or two at a time and take breaks to allow your muscles to recuperate. The sound of persistent pecking can also irritate others. Just ask Larry's wife!
Continuing the pecking process: https://www.youtube.com/watch?v=9M7rc-rcq3M
Pecking the groove: https://www.youtube.com/watch?v=01ryTMXU4_8
Grinding
Grinding is done by rubbing the stone
on a sandstone slab. This produces the smoother surface on the piece and
sharpens the bit.
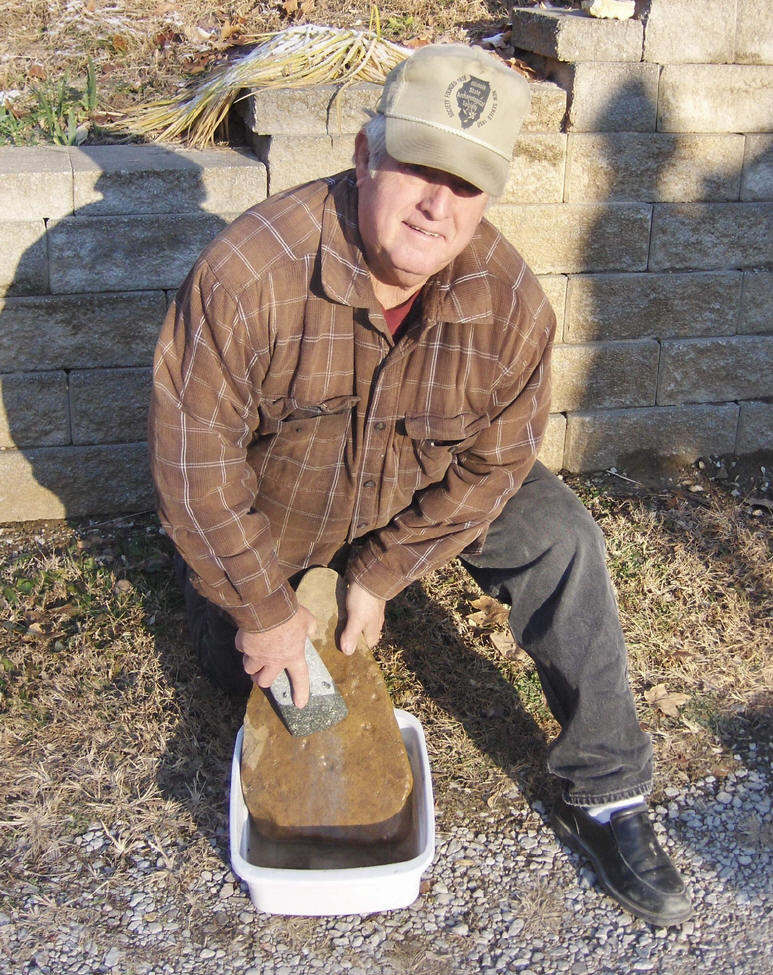 The grain size and hardness of the sandstone will determine
how fast the finished product is sharpened. Larry also uses water with this
process, placing one end of the sandstone slab in water
The grain size and hardness of the sandstone will determine
how fast the finished product is sharpened. Larry also uses water with this
process, placing one end of the sandstone slab in water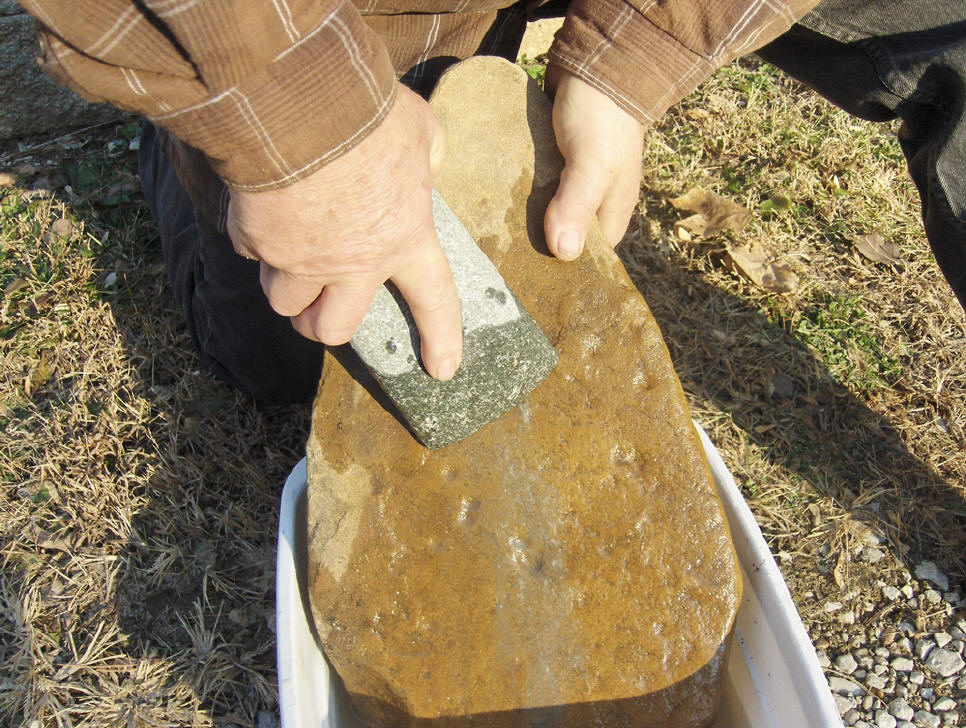 and picking up a little water
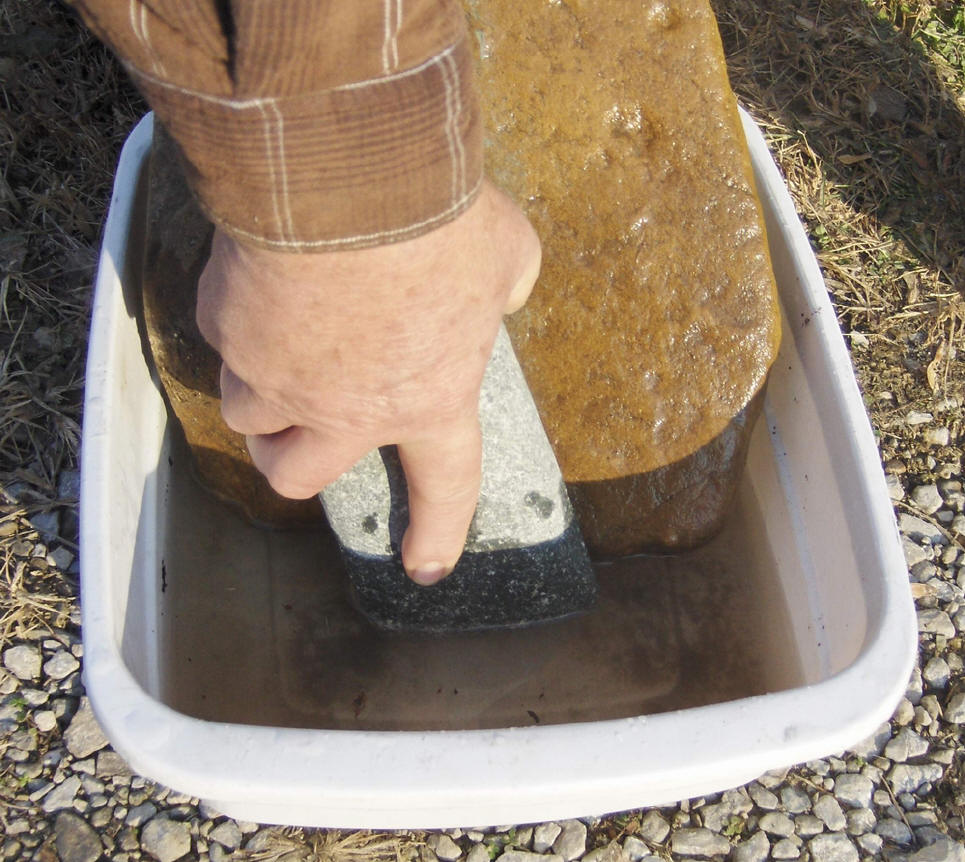 with each stroke of the tool. Care must be taken when sharpening as dragging the
tool back to the top can knock small grains off the edge. This can be avoided by
using finer grained slabs when near the bit.
with each stroke of the tool. Care must be taken when sharpening as dragging the
tool back to the top can knock small grains off the edge. This can be avoided by
using finer grained slabs when near the bit.
Modern grinding stones, electric grinders, diamond wheels, sandpapers, etc can be used but care should be taken not to "hollow grind" the edges. The edges must be convex to keep their strength.
Good sandstone is hard to come by in a lot of areas. Garden centers are a good source for excellent sandstone because they usually carry sandstone stepping stones and landscape materials.
Grinding the groove: https://www.youtube.com/watch?v=IM8dfyBWFwY
Grinding the bit https://www.youtube.com/watch?v=n4DZUhWskoY
Finishing the grinding: https://www.youtube.com/watch?v=WAnCmrdUR5k
Axe instructions
When using and caring for stone axes several precautions should be taken:
1) Do not use the axe or celt over concrete or rocky areas. One of the worst things you can do to an axe/celt is to nick or gouge the bit. Axes/celts are not like steel tools. When a nick occurs, it must be ground or pecked out to preserve the same edge angle as was on the original. With a steel axe, it can be simply filed down to remove the nick because the edge is so thin. On a stone axe/celt the surface must be taken down to maintain the correct edge angle. If the edge angle is too low, the stone will break, too high, and it won’t cut.
When Larry ships his axes/celts, he usually adds a protective leather sheath over the bit of the tool to protect it from nicks. This sleave should be installed when the axe/celt is not in use.
2) Make sure the stone stays tight in the handle. When the stone gets loose, it can “side-slap” and the stone may break. This is mostly appropriate for axes rather than celts because celts are wedged into the handle and should stay tight until removed.
3) When removing a celt from the handle it is imperative that the stone be replaced exactly the same way as it was originally. Inserting the stone backwards will break the handle!! Larry uses “creases” to make sure the front of the celt is easy to define. The “crease” is a small scratch on the celt, just above the bit, on the front of the stone. The “crease” may be easier to feel than to see. Just make sure it is at the front of the tool every time it is removed or knocked out accidentally.
4) Do not allow the sides of the stone to touch the sides of the handle on the celt. Only the front and back of the stone should touch or the handle will break.
5) Keep the handle oiled. Larry usually uses fine oil like extra virgin olive oil to keep the handle from drying too quickly. He will oil his handles twice before shipping but recommends oiling them before storing.
6) While chopping, keep the angle of the chop only a few degrees from perpendicular to the wood. Stone axes/celts should not be used with the same striking angle as steel axes. The steeper angle is preferred to prevent side-slap which can break the stone. In other words, if the log is horizontal, strike it with an almost vertical blow. Larry suggests using an anvil (a wooden log) under the portion to be chopped. This will keep the chopping log from bouncing thereby increasing the efficiency of the axe/celt.
7) Safety. When chopping, you will notice that the debris will fly much farther than with a steel axe. That’s because the axe/celt makes an initial cut then wedges the material out of the cut with a lot of force. The material will fly to the right and/or left for a distance of nearly 40 feet in either direction. Make sure your audience is either in front or behind you to keep them safe. The flakes fly with some velocity and can be quite dangerous. Larry makes observers stay at least 10 feet in front or behind him.
The axes/celts Larry makes are made to cut wood and, even if they are used as movie props or museum displays, they are perfectly usable tools and should last for hundreds of years, if properly maintained.